What to Expect During Your Roof Replacement: Day-by-Day
A detailed timeline of the roof replacement process, from pre-installation preparation to final cleanup. Know exactly what happens each day and hour of your project.
A roof replacement is one of the largest home improvement projects you'll experience. Unlike interior renovations where you can close a door and forget about it, a roof replacement takes over your entire property for one to three days. Knowing exactly what happens--hour by hour--eliminates surprises and helps you prepare your household.
This guide walks you through the complete roof replacement process timeline, from the days leading up to installation through final cleanup and inspection. We've included Texas-specific considerations for heat, weather, and scheduling that affect every project we complete.
Timeline Overview: How Long Does a Roof Replacement Take?
Most residential roof replacements take 1-3 days, depending on size, complexity, and weather. Here's a general breakdown:
| Roof Size | Square Footage | Typical Timeline |
|---|---|---|
| Small | Under 1,500 sq ft | 1 day |
| Average | 1,500-2,500 sq ft | 1-2 days |
| Large | 2,500-3,500 sq ft | 2 days |
| Very Large/Complex | 3,500+ sq ft | 2-3 days |
Factors that extend timelines:
- Multiple roof layers -- Removing two or three existing layers takes longer than one
- Steep pitch -- Roofs with pitches above 8/12 require additional safety measures and slow work
- Complex architecture -- Dormers, valleys, skylights, and multiple roof planes add time
- Deck damage -- Significant rotted decking discovered during tear-off requires repair
- Weather interruptions -- Rain, lightning, or extreme heat can pause work
Pre-Installation Preparation (1-2 Days Before)
The days before installation are about setting your property up for a smooth project. Here's what happens and what you should do:
What Your Contractor Does:
- Confirms material delivery date and time -- Materials typically arrive the day before or morning of installation
- Reviews weather forecast -- May reschedule if rain or severe weather is expected
- Coordinates crew and equipment -- Ensures adequate manpower and tools for your roof size
- Contacts you with final details -- Start time, crew size, parking needs, and any last-minute questions
What You Should Do:
- Clear your driveway -- The crew needs space for the materials trailer and dumpster
- Move vehicles -- Park at least 20 feet from the house to avoid falling debris
- Protect landscaping -- Move potted plants, cover delicate shrubs, and note any sensitive areas
- Remove wall decorations inside -- Vibrations can knock pictures off walls
- Secure attic items -- Dust will filter into the attic; cover stored items or move them
- Inform neighbors -- Let adjacent neighbors know about the project and potential noise
Texas Heat Consideration: During summer months (May-September), we often schedule material delivery for late afternoon the day before. This prevents shingles from sitting in direct sun all day and becoming too pliable to handle. If materials must arrive morning-of, we stage them in shaded areas when possible.
Material Delivery and Staging
Materials typically arrive the day before installation or early morning the day of. Here's what this involves:
What Gets Delivered:
- Shingles or roofing material -- Delivered on pallets, often placed directly on the roof by boom truck
- Underlayment -- Synthetic or felt underlayment in rolls
- Starter strip and ridge cap -- Specialty shingles for edges and peaks
- Flashing materials -- Drip edge, step flashing, valley metal
- Ventilation components -- Ridge vents, box vents, or powered vents as specified
- Pipe boots and accessories -- Sealants, nails, and vent covers
Staging Location:
If a boom truck delivers materials directly to the roof, they'll be strategically placed across the roof surface. This distributes weight and keeps materials accessible during installation. If ground delivery, materials are placed on the driveway or designated staging area.
A dumpster or roll-off container for debris typically arrives the morning of installation and is placed in the driveway or street (with permits if required by your municipality).
Installation Day: Hour-by-Hour Timeline
Here's what a typical installation day looks like for an average-sized roof (about 25 squares or 2,500 sq ft):
6:30 AM - 7:00 AM: Crew Arrival and Setup
- Crew arrives and parks equipment
- Ladders positioned at multiple access points
- Safety equipment checked and distributed
- Tarps placed to protect landscaping and catch debris
- Dumpster positioned for easy debris disposal
Texas Summer Schedule: During peak summer months, many crews start at 6:00 AM or earlier to maximize cool morning hours. The goal is completing tear-off before the hottest part of the day when metal flashing and underlayment become dangerously hot to handle.
7:00 AM - 10:00 AM: Tear-Off Phase
This is the loudest and most intensive part of the job:
- Old shingles removed using tear-off shovels and pry bars
- Debris slides down chutes into dumpster or is carried down
- Old flashing, vents, and pipe boots removed
- Deck exposed and inspected for damage
Expect significant noise during this phase. The crew is working quickly to expose the deck before any weather issues and to complete the messy work early. You'll hear pounding, scraping, and debris falling into the dumpster.
10:00 AM - 11:00 AM: Deck Inspection and Repairs
- Full deck inspection for rot, soft spots, and damage
- Damaged decking cut out and replaced
- Loose or popped nails secured
- Deck swept clean of debris and old nails
This is when your contractor may discover hidden damage. Expect a call if significant decking repair is needed beyond what was anticipated.
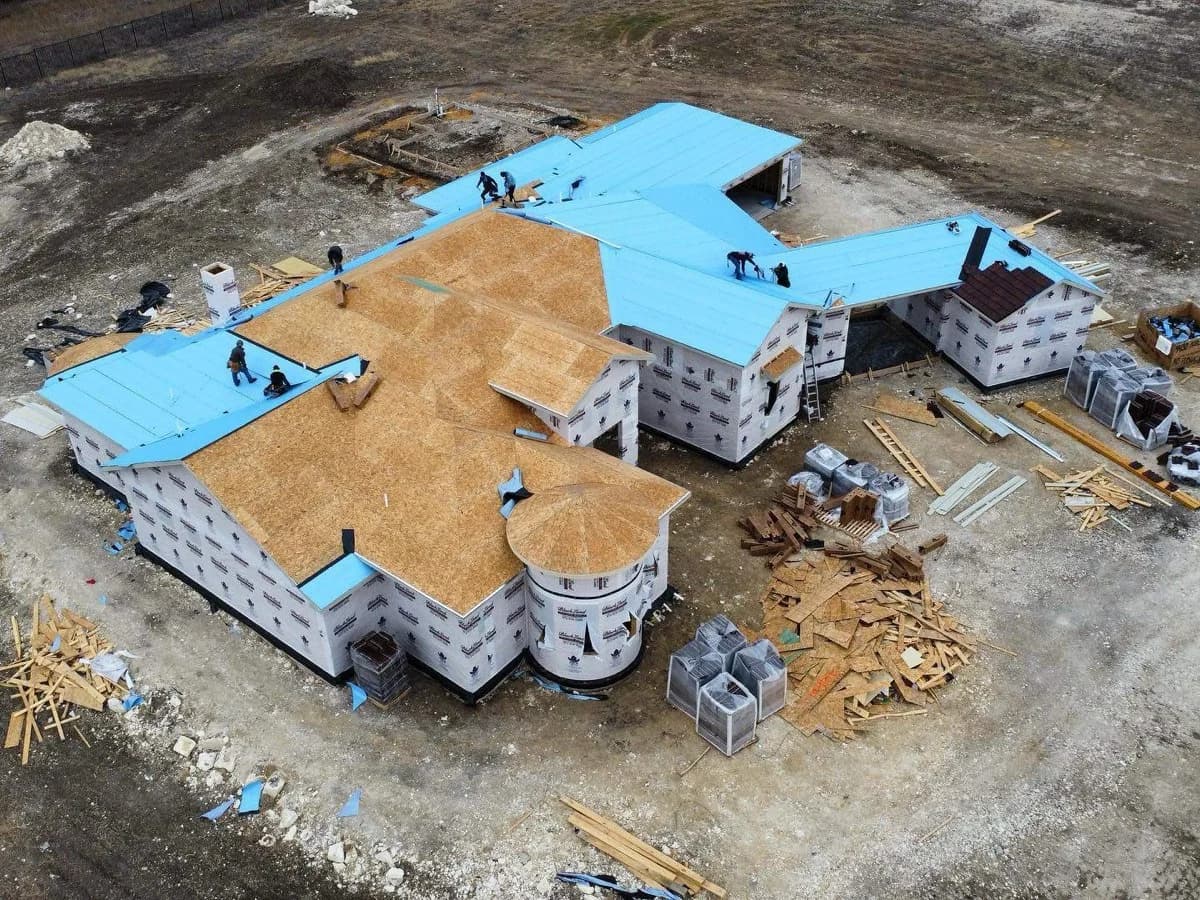
11:00 AM - 12:00 PM: Underlayment and Drip Edge
- Drip edge installed along eaves
- Underlayment rolled out and secured
- Ice and water shield applied in valleys, around penetrations, and at eaves (if specified)
- Drip edge installed along rakes (over underlayment)
With underlayment complete, your roof is temporarily waterproof. This is a critical milestone--if weather threatens, work can pause here without leaving your home exposed.
12:00 PM - 12:30 PM: Lunch Break
Crew takes a break. Good time for you to check in briefly if you have questions.
12:30 PM - 4:30 PM: Shingle Installation
- Starter strip installed along eaves and rakes
- Field shingles installed from bottom up, working across the roof
- Step flashing woven with shingles at walls
- Valley treatment completed (woven, closed-cut, or open metal)
- Penetrations flashed and sealed (pipes, vents, skylights)
This is the most time-consuming phase but also the quietest. You'll hear the rhythm of nail guns and occasional hammering for flashing work.
4:30 PM - 5:30 PM: Ridge Cap and Details
- Ridge vent installed (if applicable)
- Ridge cap shingles installed along all hips and ridges
- Final flashings checked and sealed
- Ventilation components installed
5:30 PM - 6:30 PM: Cleanup and Inspection
- Magnetic nail sweep of entire property (typically 3 passes minimum)
- Debris removed from landscaping and walkways
- Gutters cleaned of shingle debris
- Final roof inspection by crew leader
- Walkthrough with homeowner if present
The Tear-Off Process Explained
Tear-off is exactly what it sounds like: removing your existing roof down to the bare deck. Here's what to expect:
Single Layer vs. Multiple Layers
If you have one layer of shingles, tear-off is straightforward. Multiple layers complicate matters:
- Two layers -- Adds 20-30% more tear-off time and significantly more debris
- Three layers -- Rare but requires even more labor; most Texas codes prohibit more than two layers
What Comes Off:
- All shingles and underlayment
- Valley metal (unless in good condition and specified for reuse)
- Drip edge and rake edge
- Pipe boots, vent covers, and flashing
- Ridge vents or cap shingles
What Stays:
- Roof decking (unless damaged)
- Chimney and skylight structures (reflashed with new materials)
- Wall siding at roof intersections

Deck Inspection and Repairs
With the old roof removed, your contractor can finally see the true condition of your decking. This is when surprises--good or bad--emerge.
What We're Looking For:
- Rot and water damage -- Soft, spongy, or discolored decking indicates moisture intrusion
- Delamination -- Plywood layers separating, especially at edges
- Nail pops and gaps -- Areas where the deck has pulled away from rafters
- Inadequate decking -- Older homes sometimes have skip sheathing (spaced boards) that needs supplementing
Common Repair Scenarios:
| Damage Level | Repair Needed | Added Time |
|---|---|---|
| Minor (1-2 small spots) | Cut out and replace affected area | 30-60 minutes |
| Moderate (several areas) | Multiple section replacements | 1-2 hours |
| Significant (large sections) | Major decking replacement | Half day or more |
Pricing Note: Most roofing contracts include a price per sheet for decking replacement (typically $75-150 per 4x8 sheet installed). Confirm this pricing in your contract before work begins so there are no surprises if repairs are needed.
Underlayment Installation
Underlayment is your roof's secondary water barrier--the layer between the shingles and the deck. In Texas, this layer is especially critical.
Types of Underlayment:
- Synthetic underlayment -- The modern standard. Lightweight, tear-resistant, and provides excellent moisture protection. Most Texas installations use synthetic.
- Felt underlayment (tar paper) -- Traditional option, still used but less common. Heavier and can wrinkle in Texas heat.
- Ice and water shield -- Self-adhering membrane for high-risk areas. Required in valleys, around penetrations, and often at eaves.
Installation Process:
- Drip edge installed along eaves first (under underlayment)
- Underlayment rolled out horizontally, starting at eaves
- Each row overlaps the one below by 4-6 inches
- Fastened with cap nails or staples
- Drip edge installed along rakes (over underlayment)
- Ice and water shield applied in valleys and around penetrations
Once underlayment is complete, your home is protected from rain. This milestone matters if weather threatens to interrupt work.
Shingle or Material Installation
With underlayment down, the main installation begins. Here's what this phase involves:
Starter Strip:
A specialized shingle strip installed along the eaves and rakes. It provides the adhesive strip for the first course of shingles and protects against wind uplift at the edges.
Field Shingles:
- Installed from bottom to top, working across the roof
- Each course offsets from the one below (typically 6 inches for architectural shingles)
- Nail placement follows manufacturer specifications (usually 4-6 nails per shingle)
- High-wind zones require additional nails and potentially adhesive
Flashings and Details:
- Step flashing -- Metal pieces woven with shingles where roof meets walls
- Valley treatment -- Woven shingles, closed-cut method, or open metal valley
- Pipe boots -- Rubber and metal flanges around plumbing vents
- Chimney and skylight flashing -- Counter-flashing integrated with existing structures
Ridge and Hip Caps:
The final shingle installation step. Ridge cap shingles are specially designed (or cut from three-tab shingles) to wrap over the ridge and hips, providing a finished appearance and weather seal at these high-stress areas.
Cleanup and Final Inspection
A professional crew treats cleanup as seriously as installation. Here's what thorough cleanup involves:
Nail Sweep:
- Magnetic sweeper passes over entire property--driveway, yard, flower beds
- Minimum three passes in different directions
- Special attention to high-traffic areas and where children or pets play
- Check under bushes and in landscaping beds
Debris Removal:
- All visible debris collected from yard and landscaping
- Gutters cleaned of shingle granules and debris
- Tarps removed and any protected areas checked
- Dumpster/trailer loaded and removed (sometimes next day)
Final Inspection:
- Crew leader performs roof inspection for proper installation
- All flashings checked for proper seal
- Ventilation components verified operational
- Walkthrough with homeowner to address questions
- Documentation photos taken for warranty files
What Homeowners Should Do During the Process
Your preparation directly affects how smoothly the installation goes. Here's a comprehensive checklist:
Before Installation Day:
- Remove wall decorations -- Vibrations from tear-off and nailing can knock items off walls, especially on upper floors
- Cover attic items -- Dust infiltrates the attic; cover stored items with plastic sheets
- Clear driveway and garage access -- Crew needs space for materials, dumpster, and equipment
- Move vehicles -- Park down the street or at least 20 feet from the work area
- Protect or relocate landscaping -- Move potted plants; mark delicate shrubs for crew
- Secure outdoor furniture -- Patio furniture, grills, and decorations should be moved away from the house
- Note satellite dish and antenna locations -- Let contractor know if these need special handling
Pet Management:
- Keep pets indoors or away from home -- Noise, strangers, and open gates create stress and escape risks
- Board anxious dogs -- 8+ hours of pounding can be traumatic for noise-sensitive pets
- Secure gates -- Crew members move around the property; gates may be left open
- Check the yard before letting pets out -- Despite nail sweeps, stray nails can remain
Day-of Logistics:
- Plan to be available by phone -- You may need to approve unexpected repairs (like decking replacement)
- You don't need to be home -- But leave a key or garage code if the crew needs access to power or water
- Expect noise early -- Crews start at first light to beat Texas heat
- Avoid the work area -- Falling debris is dangerous; stay inside or away from the house
Power and Water: Crews need electrical access for nail guns and compressors. If your outdoor outlets are inside a locked gate or the work area, make arrangements. Some crews appreciate access to a water spigot for hydration breaks during Texas summers--a small courtesy that goes a long way.
Weather Delays and Contingencies
Texas weather is unpredictable. Here's how weather affects your project and what happens when delays occur:
Conditions That Delay Work:
- Rain -- Cannot install shingles on wet surfaces; underlayment provides temporary protection if work must pause
- Lightning within 10 miles -- Crews must come off the roof; metal tools and height create risk
- High winds (25+ mph sustained) -- Shingles won't seal properly; materials become projectiles
- Extreme cold (below 40F) -- Shingles become brittle and won't seal; rare in most of Texas
- Extreme heat (105F+) -- Safety concern for crew; shingles become too pliable to handle
What Happens If Weather Interrupts:
Before tear-off begins: Project rescheduled to the next available clear day. No harm done.
During tear-off: Crew works quickly to get underlayment down before weather arrives. If impossible, tarps provide temporary protection until work can resume.
During shingle installation: If underlayment is complete, the roof is weather-tight. Crew can return the next day to finish shingling with no water intrusion risk.
Texas-Specific Weather Patterns:
- Summer afternoon storms -- Common in June-August; most crews schedule tear-off for early morning to beat afternoon thunderstorms
- Gulf hurricanes -- Projects may pause for several days during tropical weather; plan accordingly during hurricane season
- Spring severe weather -- March-May brings unpredictable storms; flexible scheduling helps
- Winter cold fronts -- Brief but can drop temperatures below shingle installation range; usually clears within a day
Scheduling Tips for Texas:
- Fall (September-November) -- Best weather for roof installation; fewer storms, moderate temperatures
- Spring (March-May) -- Good but watch for severe weather; storms can delay projects
- Winter (December-February) -- Workable most days; occasional cold fronts cause brief delays
- Summer (June-August) -- Hottest but crews adapt with early starts; afternoon storms common
Our Experience with Installation Timelines
From our team: The biggest variable in any roof replacement timeline is what we find under the old shingles. About 30% of roofs we replace need some decking repair--usually minor, but occasionally extensive. That's why we always discuss decking repair pricing upfront and keep you informed if we find more than expected. Communication during the project is as important as the installation itself. We text photos of any issues we find and get approval before proceeding. No one likes surprise charges at the end of a project. As for the physical work, our crews are conditioned for Texas heat, but we still adjust schedules seasonally. Summer projects start at dawn. We'd rather finish early than fight the 3 PM heat index. Your roof gets the same quality either way, but the timing shifts with the temperature.
-- Hunter Lapeyre, Owner
Frequently Asked Questions
Most residential roof replacements take 1-3 days. A small to average-sized roof (under 2,500 square feet) with no complications typically completes in one day. Larger roofs, complex designs, multiple layers to remove, or decking repairs can extend the project to 2-3 days.
Crews typically arrive between 6:30 AM and 7:30 AM. During Texas summers, many crews start at 6:00 AM or earlier to maximize cooler morning hours for the most labor-intensive tear-off work. Expect noise early in the day.
You do not need to be home for the entire project, but you should be reachable by phone in case the crew discovers unexpected issues like decking damage that need your approval. Leave a key or garage code if the crew needs access to power outlets or water.
Keep pets indoors or away from the home during work. The noise from tear-off and installation can be stressful, especially for dogs. Consider boarding noise-sensitive pets. Before letting pets into the yard after completion, do your own visual check for stray nails despite the crew's magnetic sweeps.
If rain threatens during tear-off, crews work quickly to install underlayment, which provides temporary waterproofing. If underlayment is already down, rain causes no damage--crews simply return when weather clears to complete shingling. Projects may be rescheduled entirely if rain is forecast before tear-off begins.
Decking condition is only fully visible once old shingles are removed. Your contractor should contact you during the project if significant repairs are needed, with photos and pricing before proceeding. Minor repairs (1-2 small areas) are usually included or priced per sheet in your contract.
Fall (September-November) offers the most consistent weather with moderate temperatures and fewer storms. Spring works well but watch for severe weather. Summer is manageable with early starts but brings afternoon storms. Winter is generally workable with occasional brief delays from cold fronts.
Professional crews take precautions--tarps protect landscaping, and gutters are cleaned of debris during cleanup. However, some minor impact is unavoidable with heavy work. Discuss sensitive plants or features with your contractor beforehand so crews can take extra care in those areas.

Hunter Lapeyre
Owner, Lapeyre Roofing